
Calmly preparing the space to work on installing the cabinets or reinstalling cabinetry is essential. Without proper planning or materials, you can end up with bent cabinets, damaged electrical wiring, or cracks in the walls.
Here are some important steps that require attention before you install the new kitchen cabinets.
Locate the beams, water pipes, and wall conduits. Take the floor plan of the property, locate and mark the points that cannot be drilled.
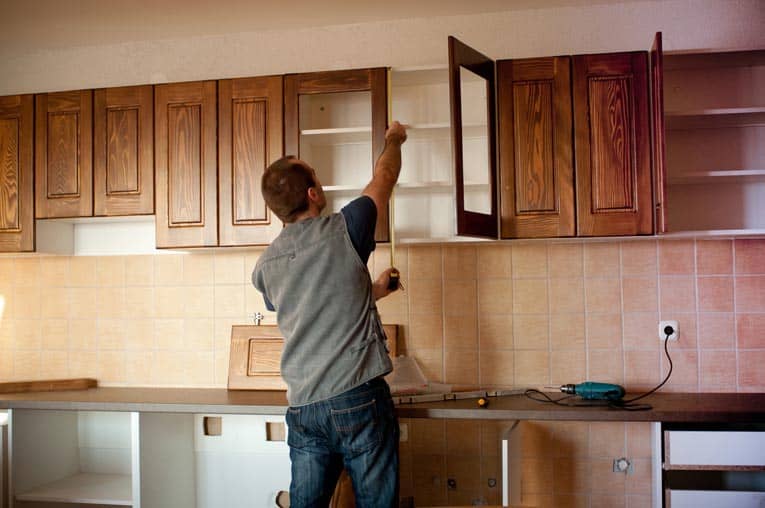
Measure 1.37 meters from the floor. Using a level gauge, draw a straight line to mark precisely where the edges of your closet will be.
Place support rails to support the cabinet against the wall.
Remove the doors from your closet.
Attach the cabinet niches with clamps or hooks for precise installation. It is essential that you only join the cabinet parts if it is possible to lift the entire piece at once safely.
Screw the niches in the closet. Secure the cabinet parts as indicated in the part assembly instructions.
Before suspending the part, drill holes in the rail located at the back of the cabinet. Mark the points on the wall where the screws will be fixed, paying attention to beams, pipes, and conduits. Then, drill the holes for the screws on the back of the cabinet, considering the measurements you have already marked on the wall. This way, you will be able to fix the cabinet precisely in the marked location.
If your cabinets have a lighting system, check that the electrical wiring passes through the middle of the suspended rail. If this is the case, choose the correct length of screws for the cabinet to cut the electrical wiring.
Step 2: Install The Wall Cabinaet
After you have prepared the space where you will work, it is time to get your hands dirty and install your new kitchen cabinet.
Lift the cabinets. Place the bottom of the cabinets on the support rails and push the cabinet against the wall.
Tighten the mounting screws in the pre-drilled openings in the suspended rail, making sure to fix the cabinets directly to the wall. If your walls are uneven, use shims along the back of the cabinets. This will prevent the cabinets from bending when you put them in place.
Make sure the cabinets are level and against the wall before mounting the next set of cabinets.
Repeat the process for the next set of cabinets until the entire installation is complete.
Step 3: How To Finish Installing Wall Cabinets In The Kitchen
Once your new cabinets have been fixed to the wall, you can put the finishing touches on them. See how to finish installing the hanging cabinets.
- Remove any staples that hold the cabinets together.
- Tighten the screws inside the cabinet – both those that connect the cabinet to the wall and those that fix the adjacent niches -, making sure that the screws are firm and resistant.
- Replace the doors in the cabinets, making sure that all are working correctly.
- Remove the support rail from the wall.
- Seal the ends of the cabinets with acrylic or polymer-based sealant or a filler strip.


Comments